
by Melody Kendall

First, after experiencing this recent hot weather my husband and I have more than once looked at each other and said, “We wanted to remove the pool...why?” But, there's no going back now. So, planning our work in the cooler early mornings, we have continued to move forward on our project.
The new trees we planted and the roses that we transplanted are doing very well and seem to enjoy their new locations. We have since installed irrigation in the rose garden, surrounded the area with a 2x6 raised bed and filled it with amended soil. It looks wonderful, I must say.
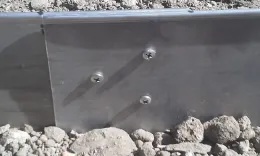
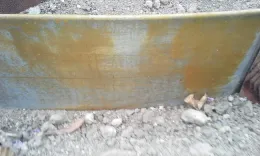
Measuring the areas and deciding on just how much we needed to complete our project was a lesson in patience. Since we wanted free form shaped planting areas, we needed something more flexible than the typical rigid metal measuring tape. We finally purchased one of those measuring devices that you roll along the ground while walking the perimeter and did the best we could. Each bender board package contained five 6-inch high by 8-foot long strips for a total of 40 feet so we ordered 4 packets. Of course, we were 40 feet too short and had to order an additional package but, still, those were pretty good calculations for amateurs.
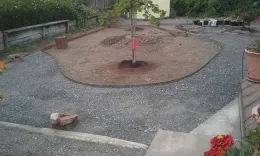
Our next project was to create the hardscape paths. Years ago, we purchased some manufactured stepping stones to go around the pool deck, and prior to the pool removal we had laboriously uprooted them and stacked them to the side. In the paths for the new landscape we planned on using these stepping stones surrounded by decomposed granite with a stabilizer added instead of cement. This would give us the desired look of a cobblestone path with the bonus of being permeable – water would pass through rather than run off.
Gophers were frequent pests in my yard, so the first step in creating our hardscape walkways was a layer of galvanized gopher wire. We purchased a 100-foot roll 5 feet wide with ½-inch cells. Wearing gloves and safety glasses I got to work. I found it to be a lot like cutting shelf paper: you lay out the wire along the metal border and cut around the curves. Wear gloves and safety glasses when working because the tendency is for the cut wire to snap back into the roll configuration and those cut edges are sharp! After we had it all laid out we went along the edges, folded them over so no sharp edges were exposed and stomped the wire flat with our boots.
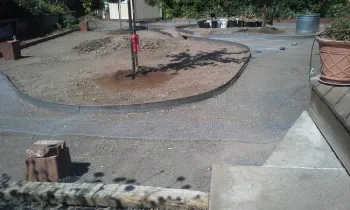
Next, we calculated the amount of underlayment gravel we would need. Those wonderful curved garden paths do not lend themselves to easy mathematical calculations. Fortunately, my husband is a math whiz. We got it figured out and ordered the underlayment gravel to be delivered. Once you have the total square feet of the area needed, I highly recommend that you allow a professional decide how many yards of the product you will need.
We are now in the process of moving rock from the front to the back, a couple of hours each morning, filling each area two inches deep with the gravel. We will wet each section down to help it settle and then go over it with a tamper and a roller style compactor (water filled barrel with a handle) to get it ready for the placement of the stones.
The saga continues...
Information links:
UC Master Gardeners of Napa County Step by Step Garden Design
http://napamg.ucanr.edu/GardenDesign/
Northern California/Nevada/Hawaii District of the American Rose Society
http://www.ncnhdistrict.org/aom/myths.html
UC Integrated Pest Mgmt
http://ipm.ucanr.edu/PMG/GARDEN/PLANTS/rose.html
UCANR Using CCA Preservative–Treated Lumber in Gardens and Landscaping
https://anrcatalog.ucanr.edu/pdf/8128.pdf
Univ of Maryland extension Permeable hardscapes
https://www.norfolk.gov/DocumentCenter/View/28747/RainscapingManualPermeableHardscapes1?bidId=